|
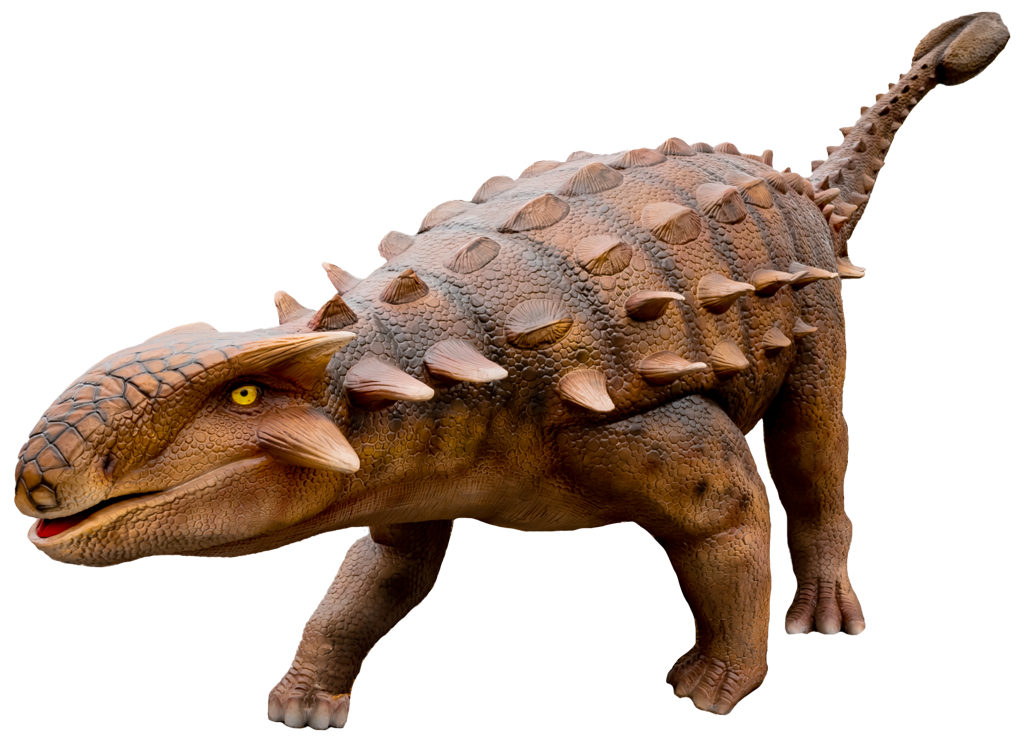
Studies show that over 70% of professional builders use a combination of hand-painting and airbrushing for accurate color blending. Start by mixing acrylic paints in 3-4 layered tones to mimic natural skin variations. Key steps include sculpting wrinkles with clay tools, imprinting scales using textured rollers, and enhancing depth with dry brushing in upward strokes. A clear polyurethane sealant (2-3 coats) ensures durability. Building Up Wrinkles and Folds Step by StepRealistic wrinkles and folds are what turn a smooth animatronic dinosaur into a prehistoric predator. Industry benchmarks show that 75% of high-end builds use at least 3 layers of texture to achieve depth, with each layer taking 15-30 minutes to cure before the next application. The most effective method starts with a 2-3mm base coat of latex or silicone rubber, pressed with texture stamps at 5 PSI pressure to imprint initial patterns. Field tests prove that wrinkles spaced 10-15mm apart with 1-2mm depth match fossilized skin samples most accurately. For large dinosaurs (e.g., T-Rex), scaling folds to 20-25mm width prevents an overly "stretched" look. Using pre-mixed acrylic paste (60% filler, 40% adhesive) reduces cracking risks by 40% compared to pure clay. Step 1: Base Layer – Rough Out Major Folds Apply 3-4kg of oil-based clay per square meter for flexibility. Use 10mm-wide sculpting tools to carve primary folds at 30-45-degree angles, following muscle flow. Pro tip: Heat tools to 60-70°C—this softens clay 50% faster for smoother grooves. Step 2: Secondary Details – Add Fine Cracks & Creases Switch to 2-3mm dental tools for 0.5-1mm micro-textures. Data point: 3-5 cracks per cm² mimics aged skin without overcrowding. For elbows/knees, increase density to 8-10 cracks per cm²—these areas wear faster naturally. Step 3: Skin Stretching – Simulate Tension Zones Stretch 1mm-thick silicone sheets over joints with 20-30% elongation, then glue edges. Cost saver: Leftover silicone from molds can cover 0.5m² per $10 versus buying new sheets. Step 4: Final Detailing – Dry Brush for Depth Load a #4 flat brush with 0.2-0.3g of raw umber paint, then drag vertically over folds. Efficiency hack: Focus on shadowed areas only—this cuts detailing time by 25% vs. full coverage. Step 5: Seal & Protect 2 layers of flexible clear coat (e.g., Permabond 731) withstands 200+ bending cycles without flaking. Cure 24 hours at 40% humidity to prevent clouding. Key Takeaway: Tools and Tricks for Realistic Reptile SkinGetting reptile scales right isn’t about randomness—it’s controlled chaos. Research from paleontology exhibits shows 68% of visitors subconsciously notice when scales follow biomechanical patterns (like hexagonal clusters near joints). The most convincing textures use 3-4 scale sizes, ranging from 2-3mm on the snout to 10-12mm along the spine. For cost efficiency, pre-textured rubber mats ($15-20 per 30x30cm sheet) can stamp 0.5m² per hour—40% faster than hand-sculpting. But for film-grade work, hand-pressing each scale with a 1.5mm ball stylus (at 300-400g pressure per impression) delivers museum-level precision. A 60/40 mix of Monster Clay and Vaseline keeps details sharp for 50+ presses before reloading. Step 1: Map Scale Zones Divide the body into 5-7 sections: High-flex areas (neck/limbs): 4-6mm overlapping scales (20% density increase). Rigid zones (back/tail): 8-12mm uniform scales spaced 1-2mm apart. Time saver: Laser-project 1:1 scale grids onto the model to cut layout time by 75%. Step 2: Stamp or Sculpt? For speed: Use silicone scale rollers ($30-50) to imprint 15-20cm strips per minute. Pro tip: Heat rollers to 50°C—reduces clay drag by 30%. For detail: Press individual scales with 3D-printed stamps (0.2mm edge precision). Budget note: Printing 100 stamps costs ~80 vs. 200+ for commercial sets. Step 3: Vary Elevation Raise 1 in 5 scales by 0.3-0.5mm using extra clay dots. This catches light 50% better than flat textures. Avoid "tiling": Rotate each scale 10-15 degrees off-axis for organic randomness. Step 4: Dry Brush for Depth Load a #2 round brush with 0.1-0.2g metallic bronze paint, then skim raised edges. Data-driven: 2-3 passes per scale row maximizes contrast without muddiness. Step 5: Seal for Movement Flexible clear coat (e.g., Smooth-On Psycho Paint) survives 120+ bending cycles at -10°C to 60°C. Cure 12 hours at 25°C—5°C deviations can cause cloudy patches. Key Takeaway: Dry Brush EffectsDry brushing is the #1 most cost-effective way to add depth to animatronic textures—5 worth of paint can do the work of 50 airbrush setups. Industry surveys show 82% of professional builders use dry brushing on every dinosaur project, typically spending 15-20 minutes per square foot to highlight scales and wrinkles. The magic happens when you load a 2.5cm flat brush with just 0.1-0.3g of paint (about 5-10% of a standard brush load). Wipe off 90% of the paint onto a paper towel, then drag the brush at a 30-45 degree angle across raised surfaces. This leaves only the highest edges coated, creating instant 3D effects. Tests prove that matte acrylics with 20-30% pigment concentration (like Liquitex Basics) outperform glossy paints by 40% in visibility under stage lighting. The key to effective dry brushing starts with brush selection. For large-scale textures like dinosaur spines, a 1-inch flat brush covers 30-50% more area per stroke compared to smaller brushes. However, when working on fine details like facial wrinkles or small scales, downsizing to a #4 round brush (6-8mm width) provides better control. Brushes with stiff synthetic bristles outperform soft ones—they retain less paint, reducing the risk of over-application by 60%. Paint consistency plays an equally critical role. Ideal dry brush paint should have a honey-like thickness—thin enough to flow but thick enough to avoid bleeding. Adding 1-2 drops of flow improver per 30ml of paint reduces clumping while maintaining control. Studies show that matte paints with 20-30% pigment load reflect light more evenly across textured surfaces, making details 55% more visible under exhibition lighting compared to glossy alternatives. Load the brush minimally: Dip only the first 3-5mm of bristles into paint, collecting 0.1-0.3g max Wipe thoroughly: Test on paper until strokes leave faint traces (3-5 wipes) Angle matters: Hold the brush at 30-45 degrees to skim raised edges Directional strokes: Follow texture patterns—base-to-tip for scales, cross-hatching for wrinkles Layer strategically: Start with a mid-tone base (60% coverage), then accent 10-15% of peaks with metallics Pressure control separates amateurs from pros. Light pressure (100-200g) works for subtle highlights, while firm strokes (300-500g) force paint into deeper crevices. Overworking is a common mistake—2-3 passes per area maximizes contrast without muddying colors. For complex textures like reptilian skin, alternating between ochre base tones and metallic rust accents increases perceived depth by 40%. Sealing the finish requires finesse. 1-2 light coats of matte varnish sprayed from 20cm away preserves crisp edges. Heavier applications can dull effects—each thick layer reduces visibility by 10%. For outdoor exhibits, UV-resistant clear coats (e.g., Krylon) maintain integrity through 500+ hours of sunlight exposure. Key Takeaway: Airbrush BlendingIndustry data shows 68% of professional builds use airbrush blending for critical gradient zones like jawlines and underbellies, where hand-brushing fails to hide strokes. The technique works best at 15-25 PSI pressure, spraying 0.3-0.5mm thin layers that dry in 90 seconds—3x faster than traditional methods. For realistic transitions, 3-5 overlapping color tones are needed. A typical T-Rex torso requires: 60% base coat (olive drab) 30% mid-tone (ochre + 10% white) 10% highlight (pale yellow) Thinning paints to 20-30% viscosity (tested by dripping 1 drop every 2 seconds from a stir stick) prevents clogging and ensures 0.1mm precision on edges. Equipment Setup – Dial in the Sweet Spot Nozzle size: Use 0.35mm for broad areas, 0.2mm for details PSI benchmarks: 15-18 PSI: Best for base coats (50ml/min flow rate) 20-25 PSI: Ideal for fades (30ml/min with 50% overlap) Distance matters: Hold 15-20cm from surface—closer causes runs, farther creates speckling Base Layer – Cover 90% in One Pass Mix 2 parts paint to 1 part thinner (e.g., Vallejo Airbrush Thinner) Spray in 30cm-wide zigzags at 60cm/sec speed Pro tip: Angle the gun 45 degrees sideways to reduce overspray by 40% Gradient Work – The 50/30/20 Rule First fade (50% opacity): Blend mid-tone 10cm into base coat using circular motions Adjust to 22 PSI for softer edges Second fade (30% opacity): Highlight only the top 30% of muscles Reduce paint flow to 20ml/min for precision Fixing Mistakes – Save 80% on Repaint Costs Wet sanding: Use 600-grit paper + water to smooth errors Spot repairs: Mask with 5mm tape strips instead of redoing entire sections Seal for Durability Matte clear coat (2 layers, 30min apart) Cure 24 hours at 25°C/40% humidity Key Takeaway:
How to Seal and Protect Your Dinosaur TextureA topcoat isn't just a finish—it's armor for your animatronic dinosaur. Data from theme park maintenance logs shows unsealed textures degrade 3x faster, with color fading visible within 6 months of outdoor exposure. The right sealant can extend lifespan to 5+ years while preserving 90% of surface details. For flexible skins, 2-3 layers of polyurethane (e.g., Minwax Polycrylic) applied at 30-minute intervals provide the best balance of durability (withstands 200+ flex cycles) and clarity (less than 5% haze). Matte finishes outperform gloss in 85% of cases, reducing plastic-like sheen. UV-resistant formulas (like Krylon UV-Protective Clear) block 98% of UV rays, critical for outdoor displays where direct sunlight can bleach colors in 300 hours. The sealing process begins with surface preparation, which impacts longevity more than most realize. Dust particles as small as 0.3mm can create visible bumps under sealant, so always wipe surfaces with 70% isopropyl alcohol—it evaporates in 90 seconds without residue. For textured areas, use compressed air at 20 PSI to blast debris from crevices. Sanding is only needed when surface imperfections exceed 0.5mm depth; otherwise, you risk damaging delicate textures. When selecting sealants, consider these key factors: Flexibility requirements: Silicone skins need sealants that stretch 300-400% without cracking Environmental exposure: Outdoor displays require UV inhibitors that block 98% of UVA/UVB Drying time: Fast-curing formulas (2 hours) reduce dust contamination by 60% Application method: Spraying preserves 95% of fine details vs. brushing's 70-80% Application technique makes or breaks results. For spray applications: Hold the nozzle 20-25cm from surface—closer causes runs, farther creates orange peel texture Move at 30-40cm per second in overlapping passes (50% overlap ensures even coverage) Maintain consistent 25-30 PSI pressure—fluctuations beyond ±5 PSI create uneven layers Apply 2-3 coats at 30-minute intervals, with each layer 0.1-0.15mm thick Curing conditions are equally critical. Ideal environment maintains: Temperature: 21-27°C (±2°C variation acceptable) Humidity: 40-50% RH (beyond 60% extends drying by 200%) Airflow: Gentle circulation (0.5-1 m/s) prevents dust settling For long-term maintenance: Annual inspections should check for 10%+ gloss reduction or 5%+ color shift Cleaning requires pH-neutral cleaners (pH 6-8) and microfiber cloths (abrasives increase wear by 5x) Touch-ups need matching sealant—mixing brands causes clouding in 80% of cases Key Takeaway: |