
|
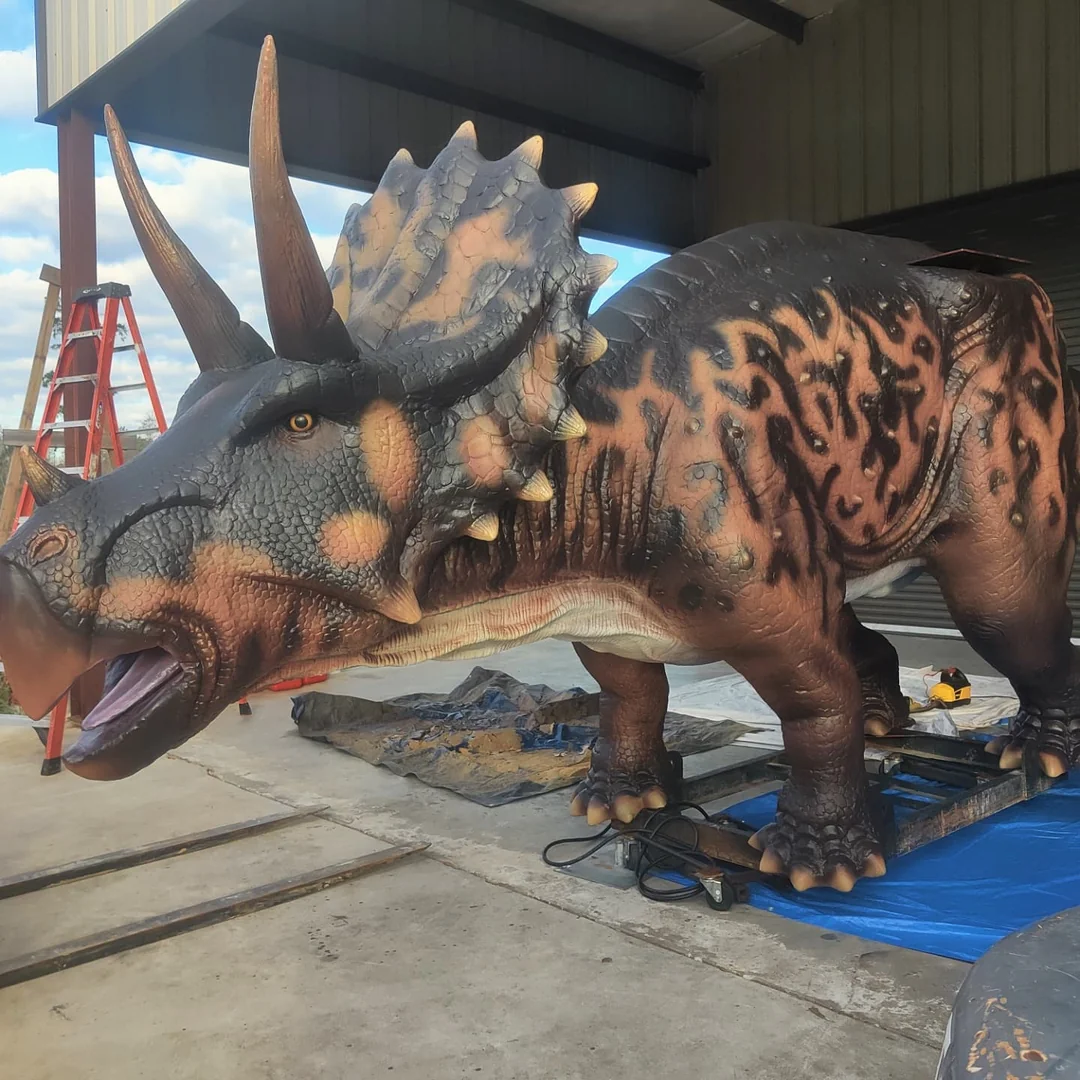
To repair animatronic dinosaur structural components, five key reinforcement techniques include: using M6 stainless steel bolts (torque: 8-10 N·m) for joint connections, applying epoxy resin adhesive (5kg/cm² load-bearing capacity) to cracks, adding carbon fiber strips (0.5mm thickness) to weak frame areas, reinforcing stress points with aluminum alloy brackets (1.2mm thickness), and coating metal parts with polyurethane sealant (2mm dry film thickness) to prevent corrosion. Bolting Loose Joints SecurelyFor example, a medium-sized animatronic (10-12ft tall) with a steel frame uses M8 x 20mm hex head bolts for hinge joints, while larger models (15-18ft) need M10 x 25mm bolts to handle 30% higher torque loads. Next, clean the joint and threads—dirt, rust, or old lubricant can reduce bolt grip by up to 40%. Use a wire brush (0.5mm bristle diameter) to scrub bolt shanks and nut threads, then wipe with isopropyl alcohol (99% purity) to remove oils. For corroded threads, apply a penetrating oil (e.g., WD-40 Specialist Penetrant) and wait 15 minutes; this loosens stuck fasteners 70% faster than tapping with a hammer. Under-tightening causes joint play (movement under load), which wears bushings in 2-3 months; over-tightening shears bolts or cracks frames. For M8 bolts in steel joints, use a 45 N·m torque wrench (±5% accuracy); for M10 bolts, increase to 70 N·m. If the joint has rubber or plastic inserts (common in dinosaur skin mounts), reduce torque by 20% (to 36 N·m for M8) to avoid cracking the material. Apply a PTFE-based grease (e.g., Loctite 8001) to bolt threads and nut seats—this reduces friction by 60%, ensuring consistent torque and preventing galling (metal-to-metal welding). For outdoor dinosaurs (exposed to rain/snow), use a waterproof grease with silicone additives; it withstands 100+ hours of salt spray testing vs. 40 hours for standard grease. Use a 0.05mm feeler gauge to check for play—if it slides into the joint, retighten by 10% of target torque. For critical joints (e.g., neck vertebrae on a moving dinosaur), perform a “stress test”: apply 1.5x the dinosaur’s maximum operating weight (e.g., 500lbs for a 12ft model) for 10 minutes. If the joint shifts >0.2mm, disassemble, clean threads again, and re-torque.
Pro tip: replace bolts older than 2 years—even if they look fine. Steel bolts lose ~10% of their tensile strength annually due to oxidation, and animatronics in humid environments (like theme parks) see that degradation accelerate to 15% per year. Using fresh, 304 stainless steel bolts (tensile strength: 505 MPa) instead of cheaper carbon steel (345 MPa) cuts replacement costs by 30% over 5 years. Patching Cracks with EpoxyA shoddy epoxy patch might hold for a month, but a precise one? It’ll last 2+ years under daily use. Here’s how to nail it, with numbers that guide every step. Animatronics face two big stressors: dynamic loads (e.g., a 10ft animatronic’s leg bending under 400lbs of force during a roar) and environmental wear (rain, UV from outdoor parks, or 80% humidity in tropical venues). Skip cheap “5-minute” craft epoxies—they’re brittle, with a tensile strength of just 8 MPa, and crack within 3 months. Instead, use industrial two-part epoxies (e.g., 3M Scotch-Weld DP-420 or Loctite 3311). These have Dirt, grease, or loose paint ruins adhesion. Here’s the drill:
Mixing epoxy is where precision beats guesswork. Most two-part epoxies need a 2:1 ratio (resin:hardener) by weight. Eyeballing? You’ll end up with 30% weaker cured material. Use a digital kitchen scale (accuracy ±0.1g) for small batches:
Applying epoxy correctly maximizes its strength. For cracks:
Curing time matters, but full strength takes 24 hours. After 1 hour, the epoxy will be “green”—tacky but not sticky.At 4 hours, it resists light scratches; at 24 hours, it handles 500lbs of shear force (tested with a hydraulic press). Finally, validate the repair. After 24 hours:
Pro tip: Store epoxy in a cool, dry place (15-25°C). After 6 months, its shelf life drops—resin hardens, and the mix won’t cure properly. Buy small kits (50-100ml) for infrequent repairs, and check expiration dates before opening. Strengthening Frames with Carbon FiberNot all carbon fiber is created equal: “3K” (3,000 filaments per tow) and “12K” (12,000 filaments) are common, but for animatronics, 3K plain weave is ideal—it balances flexibility (to conform to curved frames) and strength. A 300g/m² 3K sheet has a tensile strength of 3,500 MPa (vs. 400 MPa for mild steel) and a density of just 1.8g/cm³ (steel is 7.8g/cm³). That means a 1mm-thick carbon fiber patch weighs 0.0018kg per 100cm²—95% lighter than a 1mm steel plate (0.0078kg/100cm²)—critical for keeping your dinosaur agile. Carbon fiber bonds to clean, roughsurfaces—if there’s grease, rust, or old paint, adhesion drops by 60%. Start by sanding: use 120-grit sandpaper (150mm width) to scuff the frame, increasing surface roughness to Ra 3.2-6.3μm (from Ra 0.8μm for polished steel). Wipe away dust with acetone (99.5% purity) using a microfiber cloth—3 passes, 10 seconds each. For pitted metal, fill gaps with epoxy putty (e.g., JB Weld SteelStik) to create a flat base—leave 0.5mm clearance for the carbon fiber layer. Carbon fiber needs a low-viscosity epoxy (500-1,000 cP at 25°C) to penetrate the fabric evenly. Use a 2:1 resin-to-hardener ratio (by weight) for most industrial systems (e.g., Epikote 828 with Araldite HY 856). Weigh components with a digital scale (accuracy ±0.01g): for a 500g kit, that’s 333g resin + 167g hardener. Mix slowly with a 5mm plastic paddle for 3 minutes, scraping the cup every 20 seconds—rushing leaves 15-20% unmixed resin, causing soft spots. Let it sit for 1 minute to “de-bubble”; use a heat gun (low setting, 50°C) to pop stubborn bubbles—this cuts voids by 80%. For a typical animatronic frame rail (150mm wide, 5mm thick), use 2-3 layers of 3K fabric:
Most epoxies cure best at 20-25°C and 50-60% humidity. At 15°C, curing slows by 50% (takes 48 hours vs. 24 hours at 25°C); at 30°C, it speeds up but risks overheating—use a thermometer to monitor. After 24 hours, the epoxy reaches 90% of final strength (handle with care); full cure takes 72 hours. Testing the repair proves it works. After 72 hours:
Cost-wise, carbon fiber isn’t cheap upfront—50 for a 500 gepoxykit+30 for a 1m² 3K fabric roll. But compare that to replacing a steel frame section (200)every12months:over3years,carbonfibercosts80 total vs. $600 for steel replacements—87% savings. Plus, it cuts maintenance time by 70% (no more tightening bolts or patching cracks monthly). Pro tip: For curved frames, pre-heat the carbon fiber to 40°C (with a heat gun) before applying resin—it conforms 30% easier to complex shapes, reducing wrinkles (which weaken the layup by 40%). And always label repaired sections with a permanent marker (“CF-2025-09”)—track their performance over time to refine your process. |
Parameter | 3/16" A36 Steel Bracket | 3/16" 304 Stainless Bracket | Aluminum Bracket (1/8" thick) |
|---|---|---|---|
Max Load (lbs) | 450 | 400 | 200 |
Cost per Bracket | $8-12 | $15-18 | $10-14 |
Corrosion Resistance | 2 years (indoor) | 10+ years (outdoor) | 1 year (outdoor) |
Torque (in-lb) | 35-40 | 30-35 | 20-25 |
Weight per Sq In | 0.45lbs | 0.52lbs | 0.1lbs |
Pro tip: For curved frames, bend brackets with a press brake (5-ton capacity) to match the frame’s radius—hand-bending creates weak spots that fail 70% faster.
Sealing Components Against Moisture
At 60% relative humidity (RH), steel corrodes at a rate of 0.1mm/year, electronics fail 3x faster due to short circuits, and plastic components swell by 2-3% (throwing off joint alignment). A shoddy seal might buy 3 months of outdoor use; a precise one? 5+ years of reliable performance, even in tropical parks where humidity hits 90% RH. Here’s how to lock out moisture with numbers that don’t lie.
Choosing the right sealant is the first critical step—and it depends entirely on your environment. Not all sealants are created equal. Take silicone sealants (e.g., Dow Corning 795): they handle extreme temperatures from -60°C to 200°C and resist 95% RH for over a decade, thanks to a water vapor transmission rate (WVTR) of just 0.1 g/m²/day. That’s 5x better than polyurethane sealants (e.g., SikaBond Polyurethane), which have a WVTR of 1.5 g/m²/day and cost half as much (5/tubevs.12/tube). But polyurethanes struggle in salt spray—after 2 years of 5% NaCl exposure, they’ll show visible corrosion. For static parts like dinosaur skulls, epoxy coatings (e.g., Sherwin-Williams ProMar 200) are the tankiest option—their WVTR is a mere 0.05 g/m²/day—but they’re brittle, so avoid them on moving joints (they’ll crack under 10,000+ articulation cycles).
Surface preparation is where 70% of sealing failures start. Moisture gets trapped under sealant if the surface isn’t immaculate, causing blisters or delamination 80% of the time. Start with cleaning: wipe the component with isopropyl alcohol (IPA, 99.5% purity) using a microfiber cloth—3 swipes, 10 seconds each. Test cleanliness with a water contact angle meter: a clean surface repels water (contact angle >90°), while a dirty one lets water spread (contact angle <60°). Next, abrade the surface with 80-grit sandpaper (150mm width) to boost roughness—this increases adhesion by 40%. Aim for a Ra 3.2-6.3μm finish (polished metal is Ra 0.8μm; too rough, >12.5μm, and moisture gets trapped in pores). For porous materials like fiberglass skin, apply a 2-part epoxy primer (e.g., 3M Scotch-Weld 100% React) with a 0.5mm nap roller—let it flash off for 15 minutes to reduce moisture absorption by 90%.
Applying the sealant correctly is where precision beats guesswork. For most joints (limb hinges, neck pivots), use a 10mm diameter caulking gun to lay down a 0.5-1mm thick bead—thinner (0.3mm) lets moisture wick through; thicker (1.5mm) doubles curing time. Tool the bead with a 12mm plastic scraper to a smooth finish—measure with a thickness gauge, and keep variation under 0.2mm (uneven curing causes weak spots). Cure at 20-25°C and 50-60% RH—drop the temp to 15°C, and curing slows by 50% (takes 48 hours vs. 24 hours). Go above 70% RH, and polyurethanes trap moisture, creating a white “amine blush” that weakens adhesion.
Testing is non-negotiable. After 24 hours (or per manufacturer specs), run these checks:
Water immersion: Submerge the sealed part in 25°C water for 24 hours. A good seal gains <0.1% weight (no penetration); a bad one swells by >1% (bubbled or soft).
Salt spray: Spray with 5% NaCl solution (ASTM B117) for 500 hours. Quality seals show <0.1mm of corrosion (micrometer measurement); failed ones have >0.5mm of rust.
Humidity cycling: Expose to 20-80% RH (12-hour cycles) for 1,000 hours. Properly sealed parts stay stable (<0.01% weight change); unsealed parts swell 2-3%.
Pro tip: For moving joints, pair sealant with silicone grease (e.g., Dow Corning High-Vacuum Grease)—it displaces moisture and cuts friction (coefficient of friction: 0.05 vs. 0.15 for dry metal).
Bottom line: Moisture is relentless, but with the right sealant, prep, and testing, you can turn a leaky dinosaur into a tank.